The ‘write’ way – Hand lettering

If you’ve read any of my other posts (thank you if you have!) you’ll probably have gathered that I’m a fan of the Dutch – I’m lucky enough to be married to one of them. The huge bonus is that I get to indulge myself in all things Dutch at least twice a year, but I love nothing more that the Dutch passion for design and creativity.

From the outside, everyone seems to be creative – whether it’s gardening, home decoration or just out and out crafting – and the thirst for good design and crafting is strong (or ‘sterke’ like my name sake!)

So, when my sister in law, Joon, flicked through her phone camera roll and showed me her new passion for ‘hand lettering’ on a recent car journey, I was a bit like ‘Wow, that’s nice’. It’s probably a much bigger trend than I think, but it’s the first time I’d seen it.

IMG_3733

Simple, contemporary, and for me, a new way to make unique and personal cards, there is lots of inspiration on Pinterest for hand lettering.

Joon learnt her new craft from our cousin Harriet and here’s their guide on how to do it yourself:

Step 1 – Choose a phrase – Pinterest as always is a great source of inspiration.

Step 2 – On a piece of lined paper, draw a line down the centre of the page so you can create a symmetry. Start to copy letters from your chosen Pinterest board, in pencil, fitting them between two lines. To start off choose short phrases, so that you can practise the placement of the words in the centre of the page.

Step 3 – Draw a guide on your card the same width as the two lines and copy your lettering over. If using paper, place this over your practise sheet and trace the lettering.

Step 4 – Back your lettering onto a cool patterned card. Geometric looks good.

Here’s a few more ideas to inspire you.

IMG_3729


IMG_3798

‘Behind the clouds there is always sun’

IMG_3730

IMG_3728

IMG_3737

Look around you and everywhere there is something nice to see!

Dankjewel Joon en Harriet for het deelen van jullie werk!

Paper board embroidered gift tags

Living in Manchester means that I often stumble across a new product or something I’ve never seen before. This happens mainly in the crafting mecca, that is Fred Aldous.

150829 Embroidered tags

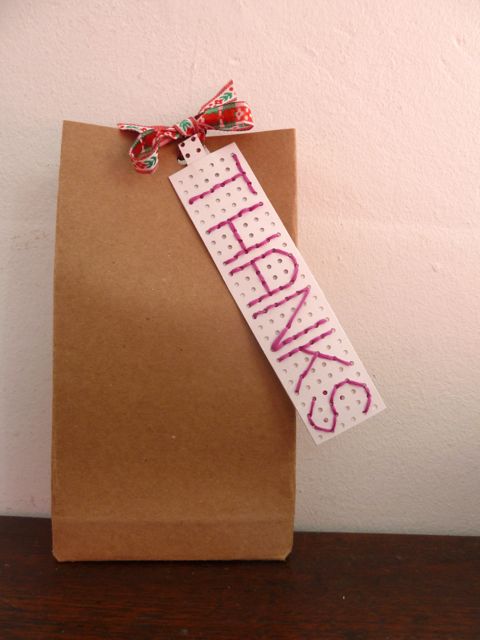
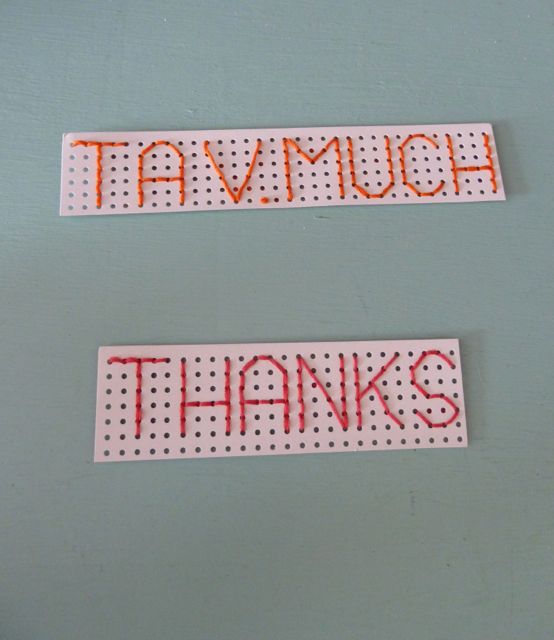
I picked up a pack of Rico embroidery board earlier in the year and it been the perfect way to add some fun to some long over due thanks you gifts, for the team who I worked with at Ministry of Craft.

two tags

I’ve kept it really simple and simply worked out the letters as I’ve gone along. With hindsight I could have made the letters one hole longer in height, which would have made the ‘S’ a bit easier, but as a starting point it’s worked out okay.

Embroidered board alphabet

A few other bloggers have used this super satisfying product too, including my friend Jennifer over at Humilde Folk and blogger Tory Jayne, who made a gorgeous lampshade out of it, using cross stitch, which I’ll definitely try out next time.

SONY DSC

Tory Jayne Embroidered board bee lampshade

The nice thing – it’s the perfect on your knee telly craft for Autumn.

Bespoke butterflies – a perfect wedding gift

Weddings, often give me the chance to try out a new craft and somehow that often seems to be some form of papercraft. For my sister-in-law, Joon’s wedding to her partner Jasper, it was no different.

Inspired by a simple, but beautiful, personalised butterfly picture that I saw on the Sizzix stand at the Crafts Hobby and Stitch show in Birmingham, I decided to make something similar from memory. What had stuck in my mind was that each butterfly had a paper tag with it – similar to a specimen chart – and by choosing words that mean something to the happy couple, it would make a really unique gift.

20150529-DSCF4451

Here’s the tutorial on how you can make your own.

What you’ll need:

  • Patterned card 230 gsm – I used the Hobbycraft Double sided Springtime Collection – 30 pack
  • Butterfly templates – From June 2015 Prima magazine – you can download it here as a  PDF here
  • Cereal packet card or similar
  • 3 mm double sided tape – available from Fred Aldous
  • Computer and printer
  • A4 coloured paper
  • Mount board – 50 x 50 cm
  • Picture frame (I used a 50 x 50 cm Ikea Ribba)
  • Pencil or pen
  • Paper scissors

Step 1 -Print the template below and cut out both sizes of butterfly. Glue onto card to create sturdier template and cut out.

Butterfly template - June 15 PRIMA 1

Step 2 – Cut out 16 large and 16 small sized butterflies from your card choice.  The small butterflies will sit on top of the large butterflies, so you can cut them either matching, contrasting card or a mixture of both.

Butterfly 1

Step 3 – Run a line of 3 mm double sided tape along the centre back of each small butterfly. Peel off the backing and match up the two butterfly heads and stick the smaller one down on top of the larger butterfly.

Butterfly 2

Step 4 – Turn over a large butterfly and draw a line from the centre of the top wing, through to the centre of the opposite bottom wing. Repeat on the opposite wing. Do the same on the backs of all of the butterflies. This cross will be used to position them later.

buttrefly 9

Step 5 – In a word document type up your words of choice and print onto coloured or plain paper and cut into approximately strips, approximately 1 cm wide and 4 cm long. Try different fonts and font sizes until you find the what suits you best.

Butterfly 4

Step 6 – Draw round a large butterfly in pencil. Lay your longest word strip over the outline, in the position you’d like it. Place the butterfly on top of the word strip and make sure the word can be seen (I left around 3 cm showing). Draw around the word strip. Place a small piece of double sided tape on the word side of each strip. Place on the guide and then stick the butterfly to the word strip.

P1010233

Step 7 – Once all the words are attached to the butterflies lay them out in the order you’d like them on a surface. (You can see from the picture below that I worked this out a step later that the words needed to be attached first – you learn from my mistake!)

BUtterfly 5

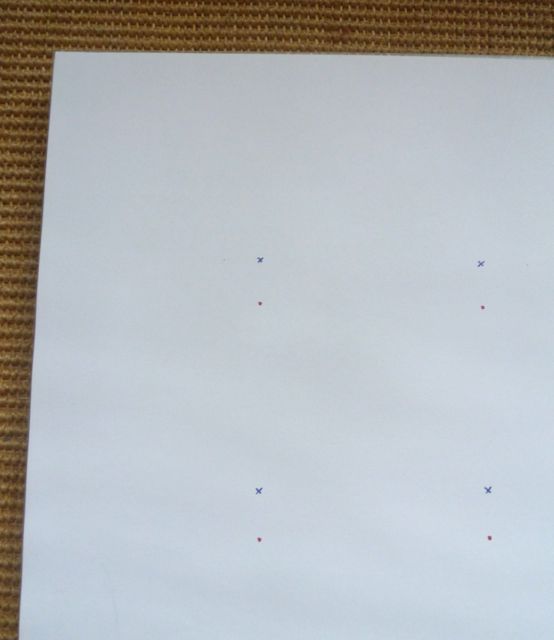
Step 8 – Take your frame and measure the back opening and cut a piece of mount board to size. Measure out a grid of 16 points, in the centre of your card, with a pencil ( marked with a blue cross on the photo).  For a frame measuring 50 x 50 cm each point should be 10 cm apart and 10 cm from the edge of the mount board.

On the reverse of a large butterfly measure from the cross in the centre to the ‘tail end’ of the body. It should be around 2 cm. Now transfer this measurement to card, by placing a pencil dot  (marked in red on the photos)2 cm below each mark. starting from the top
P1010248

Step 9 – Place another strip of 3 mm double sided tape along the length of each large butterflies body. Working through your order, remove the tape and use the second point you marked to line up each butterflies ‘tail end’, making sure it sits vertically before sticking down!P1010250

Step 10 – Make a date sign, if appropriate and stick in place below the butterflies, then reposition the card in the back of the frame.

P1010235

Pretty as a paint chip

Emptying the shelves of cards – moving in (from October!), Valentines cards and the odd Thank you – I’m managed to recycle most of them, but couldn’t part with this Papercut card from my husband for Valentines. It’s too perfect to put in a drawer and definitely needed a place where it will be on view, so it can be enjoyed.

Initially I thought about putting in a bright coloured paper behind, but wanted something to tone in with our new workspace wallpaper (more on that in a later post) and saw the pile of Valspar paint chips, from B&Q that Max, my son, has expertly matched up to the each triangular flash of colour.

P1000819

The paint chips alone have something of a design aesthetic about them – maybe its that lovely curved edged square in the centre.  I’d thought about hanging them from a shelf in some form of display, but glad I didn’t. The wallpaper has eleven colours in it, so I picked out four that sat well together to create a background for my card.

And here’s the end result – Pretty as a paint chip picture!

P1000812   P1000814P1000815